Apple Cinnamon Cream Cheese Danish: A Delicious Recipe Guide

WANT TO SAVE THIS RECIPE?

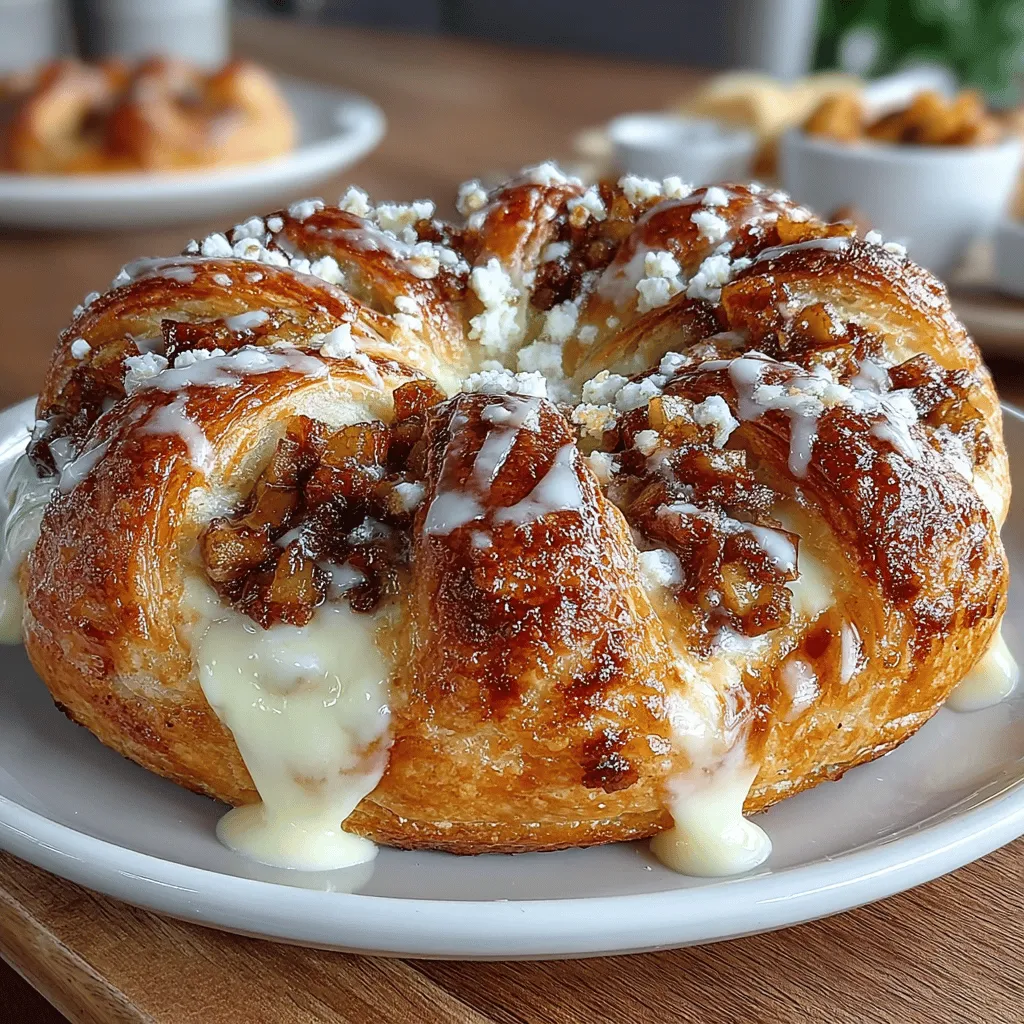
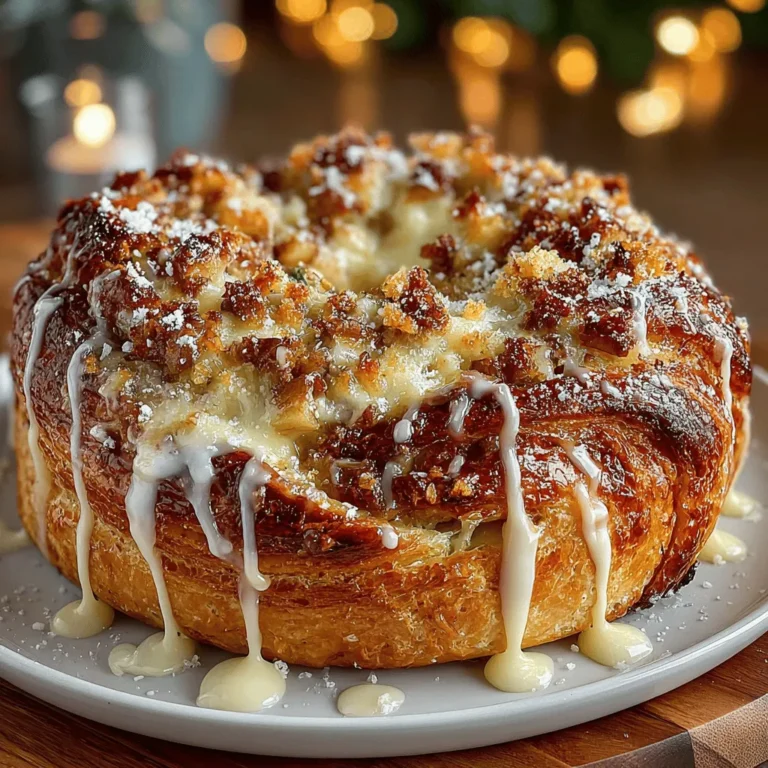
Apple Cinnamon Cream Cheese Danish Recipe: A Delightful Homemade Treat

There’s something undeniably special about homemade pastries. The aroma of freshly baked goods wafting through your kitchen has a way of evoking warmth and comfort, creating an inviting atmosphere for family and friends. Among the plethora of delightful pastry options, the Apple Cinnamon Cream Cheese Danish stands out as a favorite. This indulgent treat perfectly balances the sweetness of apples, the creamy richness of cream cheese, and the fragrant warmth of cinnamon, making it an ideal choice for breakfast, brunch, or even dessert.

In this article, we’ll take you through a detailed, step-by-step guide to crafting this delectable pastry from scratch. Whether you’re a seasoned baker or just starting out, you’ll find that creating your own Apple Cinnamon Cream Cheese Danish is a rewarding experience that yields delicious results.

Understanding the Components of the Danish

To truly appreciate the Apple Cinnamon Cream Cheese Danish, it’s essential to understand its components. This pastry is intricately layered and involves various elements that contribute to its delightful flavor and texture.

At its core, the Danish pastry originates from the rich baking traditions of Denmark, where it has been enjoyed for centuries. Known for its flaky, buttery layers, Danish pastry is a result of a laminated dough process, similar to that of croissants. The key components of this pastry include the dough itself, a luscious cream cheese filling, an apple cinnamon filling, an egg wash for a beautiful golden finish, and an optional glaze to add a touch of sweetness on top.

The quality of ingredients is paramount when crafting your Danish. Using high-quality butter, fresh apples, and real cream cheese can significantly enhance the flavor and texture of your finished pastry. Each component plays a vital role, contributing to the overall indulgence of the Apple Cinnamon Cream Cheese Danish.

Creating the Perfect Danish Dough

Now that we have a foundational understanding of the Danish pastry and its components, let’s dive into the first and most crucial part of the recipe: the dough. The Danish dough is what gives this pastry its signature flaky texture, and creating it involves a few key ingredients and steps.

The primary ingredient is all-purpose flour, which provides the necessary structure for the dough. While there are various types of flour, all-purpose flour is ideal for achieving the right balance of tenderness and strength. The inclusion of yeast is another critical factor; it acts as a leavening agent, helping the dough rise and develop a light, airy quality.

Warm milk is essential for activating the yeast. When yeast is introduced to warm milk, it begins to ferment, producing carbon dioxide that causes the dough to rise. It’s important to ensure that the milk is not too hot, as excessive heat can kill the yeast.

Step-by-Step Process for Making the Dough

1. Mixing the Dry Ingredients: Start by combining all-purpose flour, sugar, and salt in a large mixing bowl. The sugar adds a hint of sweetness, while salt enhances the overall flavor.

2. Incorporating Wet Ingredients: In a separate bowl, mix warm milk and yeast. Allow the mixture to sit for about five to ten minutes until it becomes frothy, indicating that the yeast is active. Once frothy, add this mixture to the dry ingredients along with melted butter and an egg.

3. Kneading the Dough: Use your hands or a stand mixer with a dough hook to knead the mixture until it forms a smooth and elastic dough. This process typically takes about 5-7 minutes. If the dough is too sticky, you can add a little more flour, but be cautious not to add too much, as this can lead to a dense pastry.

4. Proofing the Dough: Once kneaded, place the dough in a lightly greased bowl, cover it with a clean kitchen towel, and let it rise in a warm spot for about 1 to 1.5 hours, or until it has doubled in size. An ideal spot for proofing can be an oven preheated to the lowest setting for a few minutes, then turned off, creating a warm environment for the dough to rise.

Once your dough has risen and doubled in size, you’ll be ready to move on to the next steps of crafting the cream cheese filling and the apple cinnamon filling. Each of these components brings its own unique flavor and texture to the Apple Cinnamon Cream Cheese Danish, contributing to its delicious overall profile.

Stay tuned for the next part, where we will delve into crafting the creamy filling that complements the flaky pastry and preparing the flavorful apple cinnamon filling that makes this treat truly irresistible.

1. <strong>Mixing the Dry Ingredients</strong>: Start by combining all-purpose flour, sugar, and salt in a large mixing bowl. The sugar adds a hint of sweetness, while salt enhances the overall flavor.” /></p>
</p>
<p>Creating an Apple Cinnamon Cream Cheese Danish is a rewarding culinary experience that combines the warm flavors of cinnamon and apple with the creamy richness of cream cheese. In this section, we will delve deeper into the cooking process for the filling, shaping the Danish, baking it to perfection, and adding optional glaze and serving suggestions. Let’s ensure you have all the knowledge needed to create these delightful pastries from scratch.</p>
</p>
<h2>Cooking Process for the Filling</h2>
</p>
<p>To create a scrumptious filling for your Apple Cinnamon Cream Cheese Danish, it’s crucial to sauté the apples properly. This technique enhances their sweetness and tenderness, making them the perfect complement to the cream cheese and pastry.</p>
</p>
<h3>Techniques for Sautéing Apples</h3>
</p>
<p>1. <strong>Choosing the Right Apples</strong>: Select firm apples like Granny Smith or Honeycrisp for their balance of tartness and sweetness. Peel, core, and dice them into uniform pieces for even cooking.</p>
</p>
<p>2. <strong>Sautéing Instructions</strong>:</p>
<p>– Heat a tablespoon of unsalted butter in a large skillet over medium heat.</p>
<p>– Add the diced apples and sprinkle with a pinch of salt to enhance their natural sweetness.</p>
<p>– Cook for about 5-7 minutes, stirring occasionally until the apples soften but still retain some structure.</p>
</p>
<p>3. <strong>Achieving Flavorful, Caramelized Filling</strong>:</p>
<p>– After the apples are tender, add in 1/4 cup of brown sugar, 1 teaspoon of cinnamon, and a splash of vanilla extract.</p>
<p>– Cook for an additional 3-5 minutes until the sugar dissolves and begins to caramelize, coating the apples in a sweet glaze.</p>
<p>– For an added layer of flavor, consider incorporating a tablespoon of freshly squeezed lemon juice to balance the sweetness and prevent browning.</p>
</p>
<h2>Shaping the Danish</h2>
</p>
<p>Once your filling is ready, it’s time to focus on shaping the Danish pastries. This step is crucial for both aesthetics and achieving the right texture.</p>
</p>
<h3>Rolling Out the Dough</h3>
</p>
<p>1. <strong>Optimal Thickness</strong>: Roll out your prepared Danish dough to about 1/8-inch thickness. This ensures a flaky texture while allowing the filling to shine through without overwhelming the pastry.</p>
</p>
<p>2. <strong>Cutting and Shaping the Dough</strong>:</p>
<p>– Using a sharp knife or a pizza cutter, slice the dough into rectangles measuring approximately 4×6 inches. Ensure your cuts are clean to maintain the integrity of the pastry.</p>
</p>
<h3>Filling and Sealing the Danish</h3>
</p>
<p>1. <strong>Importance of Portion Control</strong>: Place about 1-2 tablespoons of the apple filling at the center of each rectangle. Avoid overfilling to prevent the filling from spilling out during baking.</p>
</p>
<p>2. <strong>Different Shaping Methods</strong>:</p>
<p>– <strong>Pocket Method</strong>: Fold the dough over the filling to create a pocket. Pinch the edges together to seal, ensuring no filling escapes.</p>
<p>– <strong>Twist Method</strong>: Cut slits along the sides of the rectangle, then twist the dough over the filling, creating a visually appealing design that allows the filling to peek through.</p>
</p>
<h2>Baking to Perfection</h2>
</p>
<p>Baking is where all your hard work comes together, transforming raw dough and filling into golden, flaky pastries.</p>
</p>
<h3>Preheating the Oven</h3>
</p>
<p>Preheat your oven to 375°F (190°C) at least 15 minutes before baking. This ensures even cooking and the perfect rise for your Danish.</p>
</p>
<h3>Egg Wash Application</h3>
</p>
<p>Applying an egg wash before baking is essential for achieving a golden, glossy finish. Here’s how to do it:</p>
</p>
<p>1. <strong>Prepare the Egg Wash</strong>: Whisk one egg with a tablespoon of milk or water until combined.</p>
<p>2. <strong>Application</strong>: Using a pastry brush, gently coat the tops of each Danish with the egg wash, taking care not to let it drip down the sides.</p>
</p>
<h3>Baking Time and Temperature Guidelines</h3>
</p>
<p>1. <strong>Bake</strong>: Place your shaped Danish on a parchment-lined baking sheet and bake for 20-25 minutes or until they are golden brown and puffed up.</p>
<p>2. <strong>Signs of Perfection</strong>: Look for a deep golden color and a slightly crisp texture. If you gently tap the bottom, it should sound hollow, indicating it’s fully baked.</p>
</p>
<h3>Cooling Tips for Maintaining Texture</h3>
</p>
<p>Allow the Danish to cool on a wire rack for at least 10 minutes before serving. This helps maintain their flaky texture and prevents them from becoming soggy.</p>
</p>
<h2>Optional Glaze for Added Flavor</h2>
</p>
<p>An optional glaze can elevate your Apple Cinnamon Cream Cheese Danish, adding a sweet finish that complements the flavors of the filling.</p>
</p>
<h3>Explanation of the Optional Glaze</h3>
</p>
<p>A simple glaze made from powdered sugar and milk can enhance the sweetness and provide a beautiful finish. It’s a delightful addition that makes your pastries look even more appealing.</p>
</p>
<h3>Simple Recipe for the Glaze</h3>
</p>
<p>1. <strong>Ingredients</strong>:</p>
<p>– 1 cup powdered sugar</p>
<p>– 2-3 tablespoons milk (adjust for consistency)</p>
<p>– 1/2 teaspoon vanilla extract (optional)</p>
</p>
<p>2. <strong>Instructions</strong>:</p>
<p>– In a small bowl, whisk together the powdered sugar and milk until smooth. Adjust the milk quantity for your desired consistency; it should be thick enough to hold its shape but thin enough to drizzle.</p>
</p>
<h3>Tips for Achieving the Right Consistency</h3>
</p>
<p>For a thicker glaze, use less milk, and for a thinner one, add a bit more. The glaze should flow easily but not be too runny.</p>
</p>
<h3>Ideas for Flavor Variations</h3>
</p>
<p>– <strong>Spiced Glaze</strong>: Add a pinch of cinnamon or nutmeg to your glaze for extra flavor.</p>
<p>– <strong>Lemon Glaze</strong>: Substitute lemon juice for milk for a refreshing citrus twist.</p>
<p>– <strong>Maple Glaze</strong>: Use maple syrup instead of milk for a unique flavor profile.</p>
</p>
<h2>Serving Suggestions</h2>
</p>
<p>Your Apple Cinnamon Cream Cheese Danish can be enjoyed in various settings, making it a versatile pastry for any occasion.</p>
</p>
<h3>Pairing with Beverages</h3>
</p>
<p>These Danish pastries pair wonderfully with a cup of freshly brewed coffee or a warm cup of tea. The rich flavors complement the beverages, enhancing the overall experience.</p>
</p>
<h3>Suggestions for Serving Occasions</h3>
</p>
<p>– <strong>Breakfast</strong>: Serve them warm alongside scrambled eggs and bacon for a balanced breakfast.</p>
<p>– <strong>Brunch</strong>: Perfect for a weekend brunch spread, these pastries can be a show-stopping centerpiece.</p>
<p>– <strong>Dessert</strong>: Light enough to be a delightful dessert, especially when drizzled with glaze.</p>
</p>
<h3>Visual Presentation Tips</h3>
</p>
<p>To impress your guests, consider arranging the Danish on a beautiful platter. Dust with powdered sugar or drizzle with glaze right before serving to create an eye-catching display.</p>
</p>
<h2>Conclusion</h2>
</p>
<p>In summary, creating your own Apple Cinnamon Cream Cheese Danish is a fulfilling process that yields delicious results. From sautéing the apples for the perfect filling to shaping and baking the dough, each step contributes to the final product. The satisfaction of biting into a warm, flaky Danish filled with sweet apple and creamy cheese is unparalleled.</p>
</p>
<p>Don’t hesitate to experiment with different flavors and fillings, whether it’s adding nuts for crunch or swapping in other fruits. Each variation offers a new twist on this classic recipe. Enjoy your homemade Apple Cinnamon Cream Cheese Danish fresh from the oven, and share the joy with family and friends who will surely be impressed by your baking prowess!</p>
</div>

1. Mixing the Dry Ingredients: Start by combining all-purpose flour, sugar, and salt in a large mixing bowl. The sugar adds a hint of sweetness, while salt enhances the overall flavor.

Apple Cinnamon Cream Cheese Danish

Discover the joy of baking with this delightful Apple Cinnamon Cream Cheese Danish recipe! Perfect for breakfast, brunch, or dessert, these homemade pastries combine the sweetness of apples, creamy cream cheese, and warming cinnamon into a flaky treat that’s sure to impress. Follow our step-by-step guide to make the buttery pastry from scratch, sauté the apples for a delicious filling, and create a perfect glaze. Enjoy the warmth of fresh-baked pastries right from your kitchen!

Ingredients
  

For the Danish dough:

2 cups all-purpose flour

2 tablespoons granulated sugar

1 teaspoon salt

1 packet (2 1/4 teaspoons) active dry yeast

1/2 cup whole milk, warmed to about 110°F (43°C)

1/4 cup unsalted butter, melted

1 large egg

For the cream cheese filling:

8 oz cream cheese, softened

1/4 cup powdered sugar

1 teaspoon vanilla extract

For the apple cinnamon filling:

2 medium apples, peeled and diced (preferably Granny Smith)

1/4 cup brown sugar

1 teaspoon cinnamon

1 tablespoon lemon juice

1 tablespoon unsalted butter

For the egg wash:

1 egg, beaten

1 tablespoon milk

For the glaze (optional):

1/2 cup powdered sugar

1-2 tablespoons milk

Instructions
 

Prepare the Danish dough: In a mixing bowl, combine the flour, sugar, salt, and yeast. Slowly pour in the warmed milk, melted butter, and beaten egg. Mix until a dough forms. Knead for about 5-7 minutes on a floured surface, until smooth. Place the dough in a greased bowl, cover with plastic wrap, and let it rise in a warm place for about 1 hour or until doubled in size.

    Make the cream cheese filling: In a mixing bowl, combine the softened cream cheese, powdered sugar, and vanilla extract. Mix until smooth and creamy. Set aside.

      Prepare the apple cinnamon filling: In a skillet, melt the butter over medium heat. Add the diced apples, brown sugar, cinnamon, and lemon juice. Cook for about 5-7 minutes until the apples are tender and the mixture is bubbly. Remove from heat and let cool.

        Roll out the dough: After the dough has risen, punch it down, and transfer it to a floured surface. Roll it out into a rectangle, about 1/4 inch thick.

          Cut the dough: Cut the dough into smaller rectangles (about 4x6 inches). On each rectangle, place a spoonful of the cream cheese filling in the center, followed by a spoonful of the apple cinnamon filling.

            Shape the Danish: Fold the edges of the rectangles over the filling to create a pocket, pinching the seams to seal. You can also create a twist by rolling the dough around the filling before sealing. Place them on a baking sheet lined with parchment paper.

              Preheat the oven: Preheat your oven to 375°F (190°C).

                Apply the egg wash: In a small bowl, whisk together the beaten egg and milk. Brush the egg wash over the tops of the Danish to give them a golden sheen while baking.

                  Bake the Danish: Bake in the preheated oven for about 20-25 minutes or until golden brown. Allow to cool slightly on a wire rack.

                    Make the optional glaze: If desired, mix the powdered sugar with milk until smooth and drizzle it over the cooled Danish.

                      Serve: Enjoy your warm Apple Cinnamon Cream Cheese Danish with a cup of coffee or tea!

                        Prep Time, Total Time, Servings: 30 minutes | 1 hour 30 minutes | 8 servings

                          WANT TO SAVE THIS RECIPE?

                          Leave a Comment

                          Recipe Rating